In photography terminology "distortion" is how camera lenses twists the photo unnaturally around an axis due to lens' designs and flaws. Straight lines might bend outwards as if the photo is wrapped around a barrel and this is why effect is called "barrel distortion. In many modern lenses distortion is barely noticable and most amateur photographers do not even notice it.
However if you shoot a photo where straight horizontal line(s) (such as skyline in sunsets) exist, if your focal length was wide (distortion occurs more in wide focal lengths) and most importantly your horizontal line is close to the upper or bottom section of the photo, you might notice and annoyed that its not straight enough.
Many professional sources, just as photo magazines, blogs etc. do distortion testes for lenses but if you ran into them before, you might think they are not very easy to understand especially for amateur photographers. In many of tests they use brick walls to show you the distortion or also give you a lot of technical numbers explain the phenomenon. I don't know you but I think this kind of distortion tests are pretty inpractical and usless especially if you are not a pro photographer.
Most amateur photograper only deal with with "distortion" when they shoot skyline in landscape photographers. So I decided to demostrate lens distortions simply by showing skyline shots of different lenses and this is how my test is done.
I took 3 shots for each skyline distortion test:
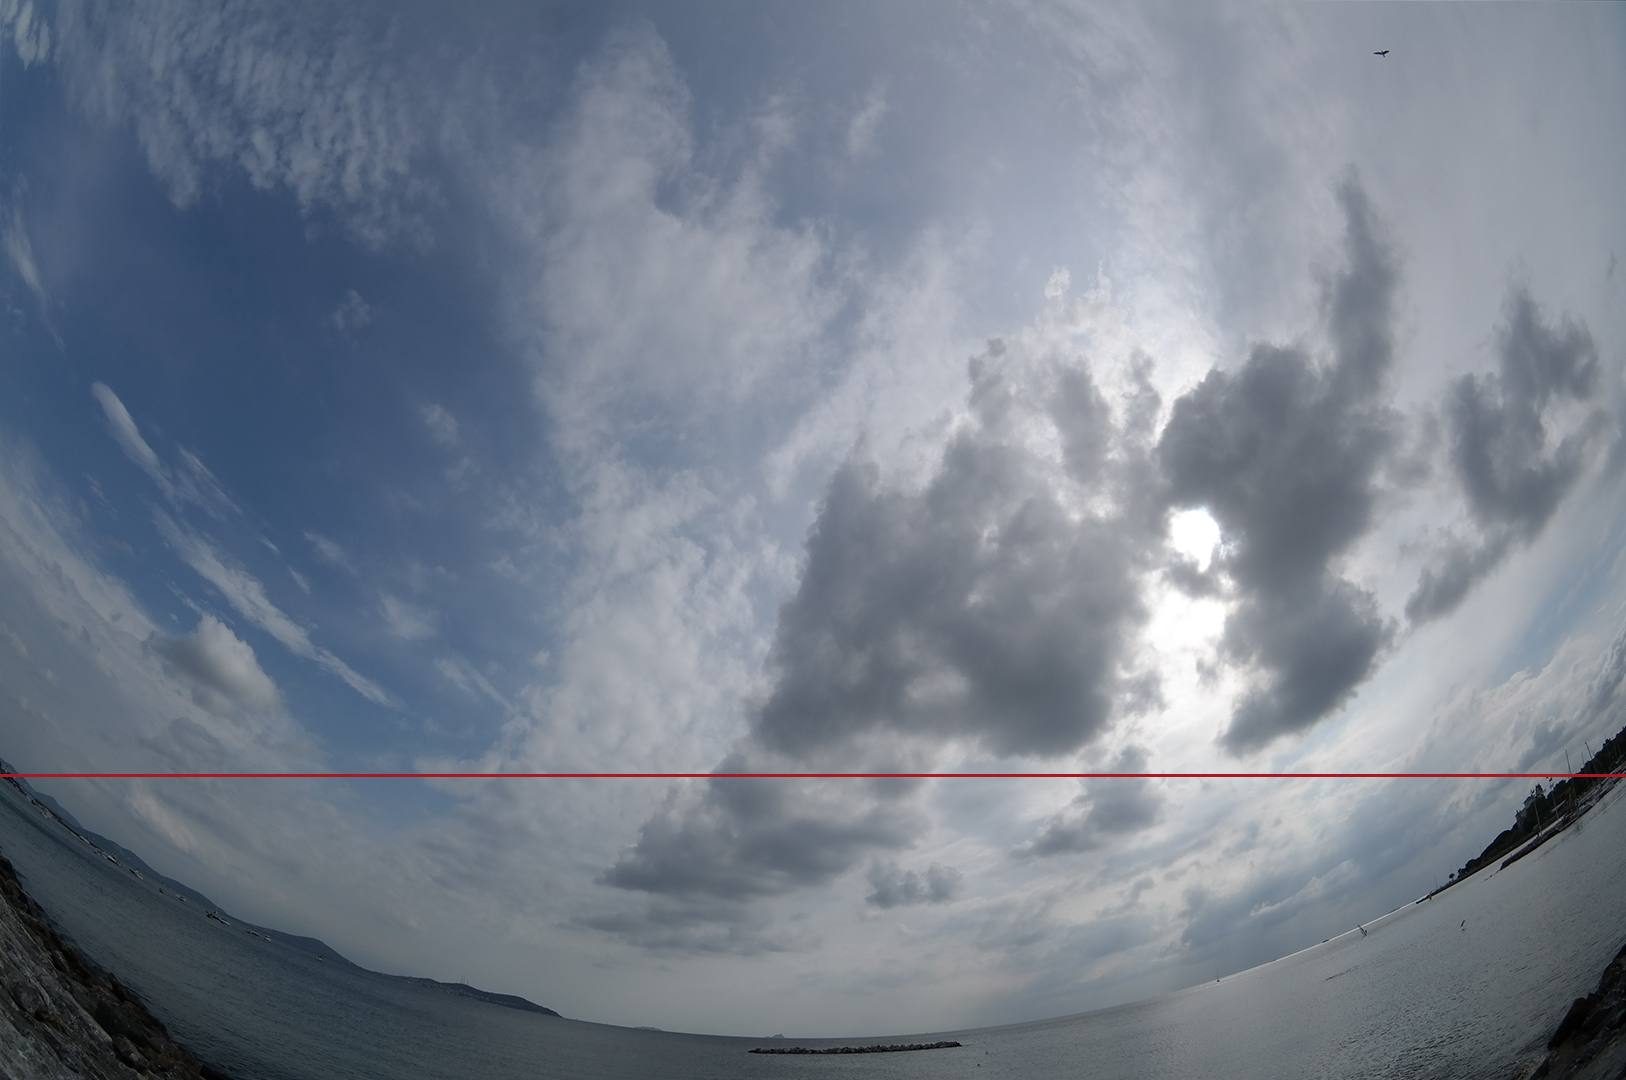
In the first shot I put the skyline to the very bottom. This is actually a never used location in scenary photos but this is also where distortion is most prominent. So to demonstrate the worst distortion of the lens I took a shot in there first.
In the second shot, I put skyline right in the dead middle of the photo. Center is a location where distortion occurs the least but I know that most amateurs tend to put skyline in the middle so I take a shot like this.
In the last shot,I put the skyline 2/3 (or 1/3) of the photo. This is where pro photographers shoot the skyline because this is known as "golden ratio" in photography. It does not matter whether you put it in 1/3 or 2/3 of photo because barrel distortion of a lens will be exactly same for both locations.
During shooting, I try to take the photo very carefully so that photo is straight. However its impossible to take 100% straight shot so in most shots there is very small percent of unwanted rotation like %0.2 or %0.3. In distortion testing this is important so after the shooting I edited all photos in photoshot and corrected their rotations. Most photo editors, including photoshop, are able to correct distortion of a photo but since this is a distortion test and my goal is to show you the distortion the lens produces, naturally I do NOT correct the distortion in post processing, I just correct the rotation.
After rotation is corrected I resize the image into HD size since we don't need a full size photo for distortion test and then mark the horizontal line with a 2 pixel red straight line to show where the skyline was suppose to be if there were no distortion in the lens. If the actual skyline right under the red line in the test photo, you can decide there is no distortion in that lens for that location and focal length. The more difference between actual skyline and red line, the worse distortion the lens have.
For a zoom lens, its distortion would be different in different focal lengths and worse in wider focal lengths. For instance with a 18-55 kit lens, barrel distortion might be insignificant when you zoom to 50 or 55mm but can be obvious when you shoot at 18mm. So don't think lens is flawless unless you shoot it with wide focal lengths.
If you want to repeat the process for your own images in Photopost, here is how you do it: (Shortcut keys mentioned in paranthesis might be different in your PS configuration)
1- Open your image in photoshop (CTRL+O)
2- Enable "Ruler" Tool (R)
3- Zoom into your image so that you clearly see horizon pixels at the right and left (Mouse scroll wheel UP)
4- Mark left horizon pixel with Ruler (Mouse left click), scroll to the right (pressing shift accelerates), mark right horizon pixel with ruler (mouse left click). Click "Straigthen Layer" icon at the top. This rotates image so that event horizon is now 100% straight.
5- When we rotate the image, we have some redundant blank pixels in all four directions of the image so let's crop them with CROP tool (C). Focus on all 4 directions of the photo and narrow the canvas so that blank pixels are removed and crop the image.
6- To resize the new image, click IMAGE/IMAGE SIZE (CTRL+ı), click "Constrain Proportions" set your new size (I use 1080 pixels for height) and resize
7- Now let's mark the event horizon with a red line to show the distortion. For that click LINE tool (U), set weigth above as "3 pixels" and select a RED color for foreground color, zoom in your image and mark your red line from left horizon to red horizon carefully.
8- Now save your new image under a new name and in JPG format and repeat the process for all other images you shoot.
Hope you enjoy my distortion test!